PayForm offers a simple way to protect the content you serve to your customers inside a Members Area. This way, only people who is currently paying for your product or service will be allowed to see this content. While you may needs some coding skills to implement this in your own website, we are also including an example using PHP that you can copy and paste into the pages you want to protect.
How to protect your content using the client_id and client_verify parameters
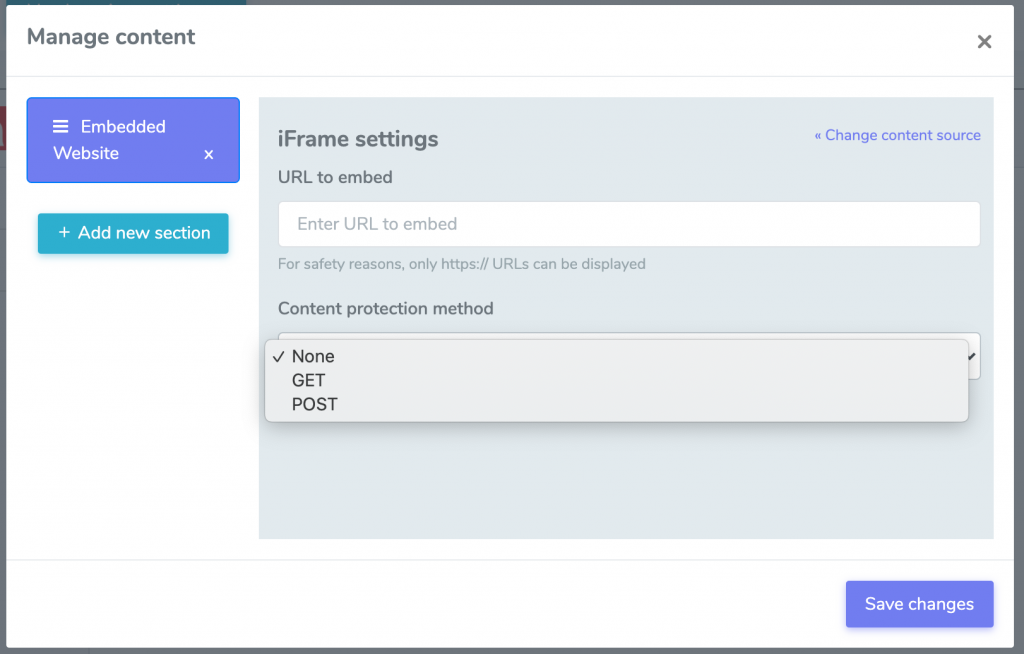
The first step is to enable a content protection method in the Manage content tab. While POST is the preferred method, we have seen that some server configurations don’t allow POST requests. We recommend you to try with POST first and see if it causes any disruption in your server.

After this setting is enabled, PayForm automatically sends two parameters, client_id and client_verify, every time a customer opens this section. With these two parameters you can validate if the request actually comes from PayForm and if you are safe to display your content.
Example of content protection using PHP
We are going to show a small example on how to protect your content using PayForm’s members area and PHP. This simple code can be used as a copy and paste solution for most PHP based sites, still, some backend knowledge can help you do amazing things.
<?php
   if (!isset($_REQUEST['client_id']) || !isset($_REQUEST['client_verify'])) {
      die("Content only available inside the members area");
   }

   // send the data back to PayForm
   $info = json_decode(file_get_contents("https://app.payform.me/verification/customer?client_id=" . $_REQUEST['client_id'] . "&client_verify=" . $_REQUEST['client_verify']));

   if ($info->status == "unverified") {
      die("Verification failed");
   }

   if ($info->customer->status !== "active" && $info->customer->status !== "trialing") {
      die("Please check your payment status");
   }

   // you are safe to show your content here
How does content protection work behind the scenes?
Now the technical explanation. What this codes does, is to send both client_id and client_verify back to PayForm, using GET, to the following endpoint:
https://app.payform.me/verification/customer
The simplest way to send both parameters is using GET (like in the previous example). Also, we can send these parameters using POST. Returning to the previous example, we made our backend call the following URL:
https://app.payform.me/verification/customer?client_id=<my_client_id>&client_verify=<my_client_verify>
Once we send both parameters to our endpoint, PayForm will return back a JSON encoded response including the verification status of the query, and relevant information about this customer. For this reason, we recommend that you call this endpoint using your backend.
The format of the response is the following:
{
     "status": "verified",
     "customer": {
          "id": "00000000-0000-0000-0000-000000000000",
          "email": "test@test.com",
          "status": "active",
          "start_date": "2021-01-01 00:00:00",
          "form_information": {
               "Name": "John Doe"
          },
          "payment_information": {
               "payment_recurrence": "none",
               "payment_plan": "Test plan",
               "payment_method": "stripe",
               "payment_subscription": "",
               "payment_amount": "99",
               "payment_currency": "usd"
          },
         "test_mode": true
     }
}
In case the user was not able to be verified, the response will be different. In this case it would be like this:
{
     "status": "unverified",
     "error": "Cause of error"
}
Feel free to explore the flexibility for protecting content that the new members area has to offer to your business. If you have any doubts about this implementation, feel free to contact support anytime.


